Showing posts with label how-to. Show all posts

Sunday, February 12, 2017

Coffee Bean Serving Tray

I bought my husband an espresso machine for Christmas and the flavor was sooo amazing that we all enjoy drinking coffee now. Once we got it set up and each acquired our own flavorings, we quickly ran out of room on the bookcase-turned-coffee bar.

resin, glaze, diy, how-to, wooden tray, serving tray, coffee bar, coffee tray, coffee beans, encore, encorediy, embedded resin

It was obvious we needed more surface space as well as additional storage. I put a call out to Facebook looking for a cheap or free dresser and a friend of mine came through in the free department. She had exactly what I was looking for and I was happy to take it off her hands.

Within days, I set to work converting it to a buffet/coffee bar. I'm painting it white and staining the top with General Finishes Java Gel Stain.  I'll detail that project in a separate post, but here's a sneak peek

resin, glaze, diy, how-to, wooden tray, serving tray, coffee bar, coffee tray, coffee beans, encore, encorediy, embedded resin

A few days after acquiring the dresser, I was digging in my storage shed and found a couple of wooden trays that I had started to work on years ago, but were abandoned. I immediately knew that one of them needed a home on the new coffee bar. And...I wanted it to be different. I had some Parks Super Glaze that I had purchased, but never used. I thought it would be so cool to create a serving tray with a bottom of coffee beans embedded in resin. And here we are!


resin, glaze, diy, how-to, wooden tray, serving tray, coffee bar, coffee tray, coffee beans, encore, encorediy, embedded resin

The trays were filthy from years of being in the shed so I cleaned one up and sanded it really well. The inside was painted in Rustoleum Metallic Bright Gold - my favorite gold spray paint. I painted the outside of it in Rustoleum Eden Green Satin then sprayed Satin Black on top of that. Did some distressing. Didn't like it, so I sprayed the whole thing gold. I might distress it a bit so some of the black shows through. I'll think about it...


resin, glaze, diy, how-to, wooden tray, serving tray, coffee bar, coffee tray, coffee beans, encore, encorediy, embedded resin


resin, glaze, diy, how-to, wooden tray, serving tray, coffee bar, coffee tray, coffee beans, encore, encorediy, embedded resin
When I saw these photos, I decided I wasn't in love
with the black so I painted the entire tray gold.
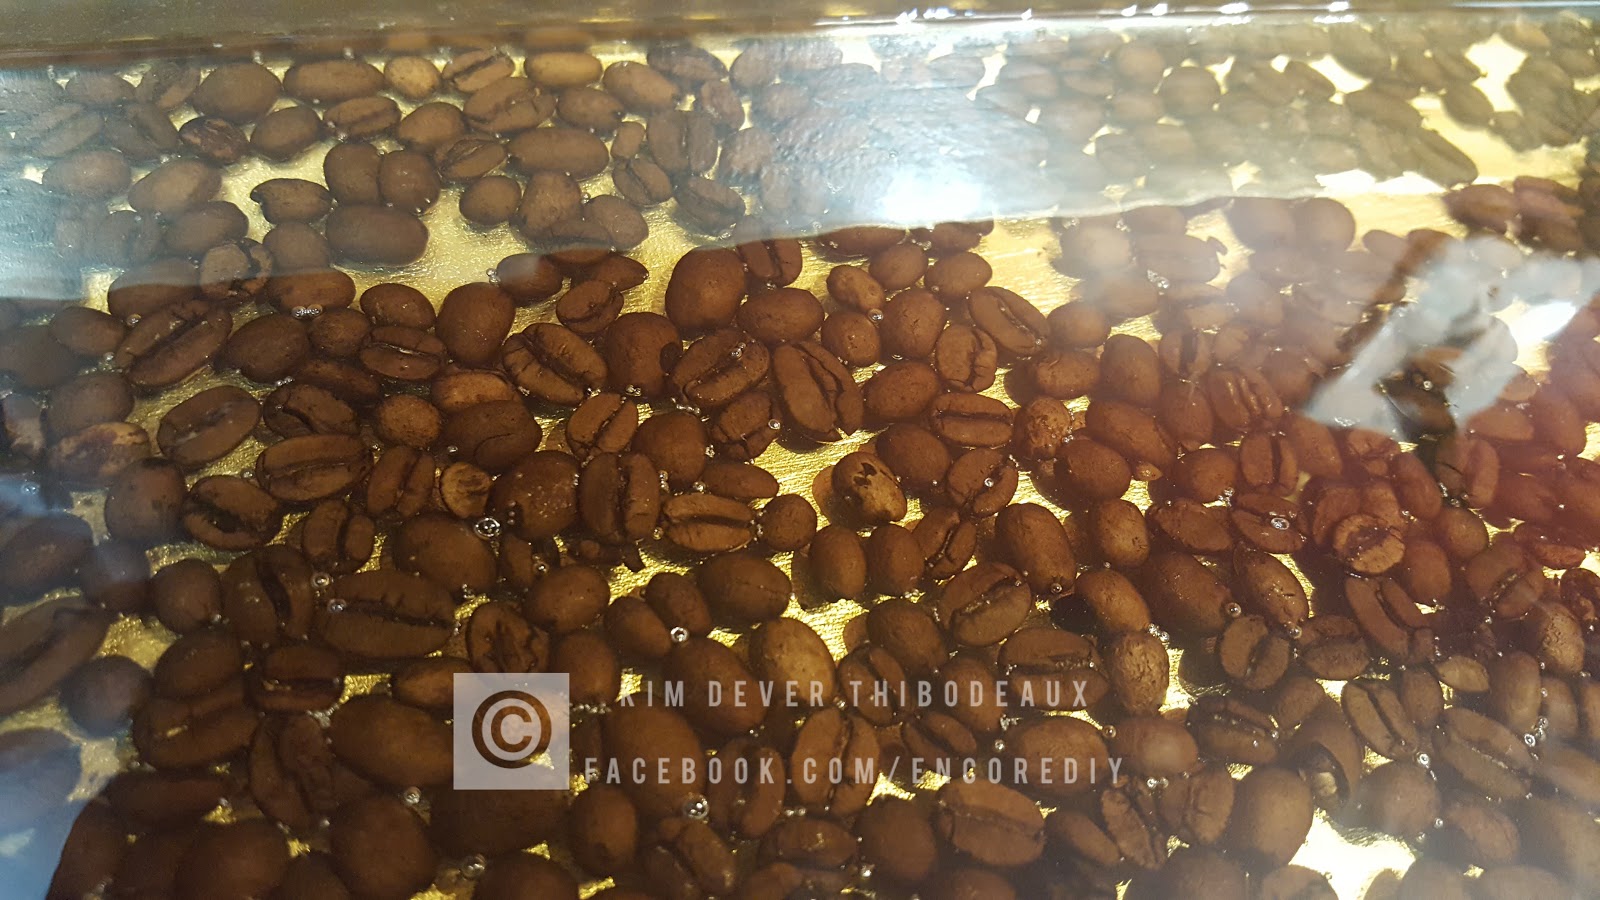
Next, I poured whole coffee beans in the tray to determine how many I needed to cover the bottom, but not completely. Then I mixed a batch of the resin according to the directions, poured it into a larger container and added in the beans. I mixed the beans and resin really well so that they were coated with the resin, then spread the mixture in the tray and evened it out, making sure some of the gold bottom showed through. I didn't mind the bubbles so I didn't bother trying to get rid of them.I covered it with a cookie sheet to make sure no dust or pet hair settled on it. I let it sit overnight.


The next day, I mixed another batch of resin and poured it on top of the previous layer so that the beans were 99.9% covered. A few beans still sit slightly above the surface, but that's OK. Again, I didn't bother with the bubbles. The pictures don't do it justice, but you get the idea.

I can't wait to finish the coffee bar so this tray can take its place of distinction. I'm thinking it will hold the containers of sugar, sprinkles, spoons, etc.

resin, glaze, diy, how-to, wooden tray, serving tray, coffee bar, coffee tray, coffee beans, encore, encorediy, embedded resin


resin, glaze, diy, how-to, wooden tray, serving tray, coffee bar, coffee tray, coffee beans, encore, encorediy, embedded resin


resin, glaze, diy, how-to, wooden tray, serving tray, coffee bar, coffee tray, coffee beans, encore, encorediy, embedded resin


Thanks for visiting,

kim


Saturday, September 3, 2016

DIY Litter Box Curtain from Skirt

We recently acquired our first indoor cat, Yuki. I decided to locate his litter box in the laundry room. It's the most logical place for it.

It was a quick and easy project - quicker than creating this post!


Supplies:

Litter box
Kitty litter
Fabric for curtain
Tension rod
Screw driver
Scissors

  1. I measured the opening, adding an inch for the hidden tension rod. 
  2. I removed the door from the sink cabinet by unscrewing the hinges. I taped the screws to the door for future use.
  3. I dug through my thrift-shop stash of clothing purchased for the fabric, not because they fit. I chose a cheerful, floral linen, gourd skirt. It was 25" long, the exact length I needed.
  4. I sewed the top edges of the waistband together to close the opening. If you don't sew, you can use staples, safety pins, or hot glue.
  5. I cut a slit on the inside of the waistband on each side, which formed a rod pocket, which I slid the rod through.
  6. I slid the rod into the cabinet and unscrewed it enough to create tension.
  7. I arranged the "curtain" and I was done.
Yuki liked it so much I didn't think he'd ever come out.


Sunday, October 12, 2014

Product Photography Light Box Tutorial


Many artisans are selling their goods online. In fact, there is so much competition that you may find yourself spending as much time on your computer promoting your creations as you spend actually creating things.

Since buyers often rely on a computer screen or smartphone to do their shopping, it's important that your creations be visually represented as accurately as possible.

Many artisans rely on a digital camera or their smartphone for photographing their products. They often point and click. The result is often photos that are poorly lit, out of focus, or shot against a messy background, which is distracting and detracts from the beauty and the perceived value of the item.

Here are some common scenarios.
Flash causes overexposure in some areas and shadows in
others. Background is distracting. Product is too far away.
You can't appreciate the details.


No flash. Scene is poorly lit causing a lot of "noise",
the little colored dots that cover the photo.
Product is out of focus.
Here's a quick and easy way to improve your photos and give the attention to your creations that they deserve. And, hopefully, help you close more sales. This tutorial shows you how to build a quick and easy light box to photograph smaller items, but the same principles will apply to larger items. This works for both DSLRs, point and shoot cameras, and smart phones. I am not a professional photographer. I'm sure that even my photos could be improved upon. But, I think they are better than average and I like to share what I've learned with others.

List of Materials:
1 cardboard box big enough to fit your product with room to spare
2 sheets of tissue paper or parchment paper or any kind of thin white material that will diffuse light
2 really really bright lights. I prefer halogen shop lights.
1 white poster board
1 box cutter or serrated steak knife or anything that will cut the cardboard
tape

  1. Decide which side of the box is going to become the "floor".
  2. Remove the flaps from the other three sides. 
  3. Cut large openings in the other three sides.
  4. Use tape and tissue paper to cover the openings.
  5. Lay the box down so that the uncut side is now the "floor" and its flap extends the floor.
  6. Place a white poster board in the box so that it curves up the back "wall" from the floor. This creates the "infinity edge" that is so desirable in product photography.
  7. Position a bright light on either side of the box so that it shines through the diffusing material (tissue paper, etc.) If you don't have shop lights, take the shades off of a couple of lamps and move them close to the diffusers. Just remember, the whiter the light, the better. 
  8. If available, shine another bright light through the top panel.
  9. Place your object on the floor and position it to your liking.


Now you're ready to make photographs.

Depending on what type of camera you are using, you may need to make a few adjustments. For this photo, I used my Samsung Galaxy Note 2 smart phone. I selected the "macro" focus mode setting and set the white balance to "incandescent" light to remove the yellow tint.


Don't be afraid to experiment. Take a photo. Make adjustments. Take another photo. Make adjustments. Adjust the different settings until you are happy with your pictures.

Now that you have your photos, you can use them as is or use software or a phone app to further enhance them. You'll probably always need to crop your photo into a pleasing composition, then,  perhaps adjust the white balance further and increase the saturation, if necessary. Basically, you should adjust the photo until you think it accurately represents your product to potential buyers.

For this image, I brought my photo in Adobe Lightroom for the basic adjustments then I brought it into Adobe Photoshop CS4 to add the banner and text. Again, a lot of this can also be done using phone apps.


Now, as I mentioned earlier, some items may be too large for a box, but the same principles apply. Use a light or non-distracting background and shine diffused light on your object from every angle to reduce shadows. If shooting outdoors, choose a bright overcast day. The clouds are nature's diffuser!

I hope you've found this quick and dirty tutorial helpful Feel free to ask questions and I'll do my best to answer. And there are no dumb questions. And if you have some tried and true methods that work for you, feel free to speak up. We're all learning here.

kim