Showing posts with label do-it-yourself. Show all posts

Wednesday, August 31, 2016

Closet Makeover and DIY Custom Foam Core Board Tray Organizer


I'm eliminating clutter from our home using the KonMari method. I learned about it in the book, "The Life-changing Magic of Tidying Up" by Marie Kondo. It may sound cliche, but it really is life-changing.


Recently, my BFF and I ripped out all of the built-in shelving from my master closet. The spacing was impractical and they weren't adjustable. We got a little aggressive with the hammer, so last weekend  I patched, sanded and repainted the closet walls.


Emptying the closet
Shelves ripped out. Walls full of dents.


Walls patched and painted

Then, my husband hung ClosetMaid Shelftrack tracks, screwing them into the wall headers. The standards hang from the track. You can reconfigure  them as your needs change over time with no unsightly holes to patch. The SuperSlide brackets let you slide hangers continuously along the rod.


I have two armoires that I bought second hand. They are solid wood, Bassett pieces that I got for $150 total. No particle board or cardboard backing here. The style is a bit dated, but they provide dust-free storage.

Since my husband is 6' 2", I decided it would be more convenient for him to reach into an armoire than bend over to retrieve clothes from dresser drawers. So I decided to move the armoires into the closet.

Before I could move his clothes in, I needed a way to contain them on the  shelves. One of Marie's methods is to fold most clothing, rather than hanging it. And, by folding it so that each piece stands on its own, you can store more items in a smaller space. Standing the items up like fabric soldiers also means nothing is hidden from view.

I searched online for storage solutions that were both practical and affordable. When I found nothing, I turned to Pinterest for some DIY inspiration. Basically, what I needed was a really big organizer tray. So, I picked up a few supplies to add to what I already had on hand and got to work.


Supplies:
foam core board (I bought a tri-fold project board)
Elmers Glue All or other PVA glue
craft knife with a fresh blade
cutting mat
pencil (I used a chalk pencil on the black board)
straight edge
tape for trimming the edges


  1. Determine the measurements for your finished product then deduct 1/2 inch from the length and width to allow for the thickness of the foam core board. Cut a piece of foam core board to these dimensions. This will be the base.  
  2. Cut two pieces to the exact length of the short sides by 3" tall. 
  3. Add 1/2" to the measurement of the long sides and cut two pieces this length by 3" tall.

  4. Run a thin bead of glue along one short side and butt a short piece to it. Secure it in place with straight pins. Then do the same to the other short side.
  5. Add a long side, which should cover the raw edges of the short sides because you added the extra length. Secure with pins. Do the same to the other side.


  6. If you want to add dividers, measure inside the assembled tray and cut to fit. glue in place. If you want to add decorative fabric or paper to the inside base, do it before adding the dividers.


  7. Once the glue has dried a about 20 minutes or so, you can remove the pins and begin trimming with tape.
  8. Cut a strip of tape to length and center it over the raw edge of one end. Trim the ends of the tape as needed then smooth it down onto the board, making sure not to press too hard, which will leave indentations in the board.


  9. Do this for the top edges, the bottom edges, then the corners. Or you may want to do the corners first, it's up to you.


  10. Add additional decorative trim if you wish.
And this is how it looks in the armoire. Pretty cool, huh?


I used black board and black tape to keep it simple. I could add a wide ribbon trim to the front or decorative knobs, even. There are lots of different decorative tapes that you can use to make your tray fun and functional. You could cover the inside with decorative paper or leave the tape off and use spray adhesive to cover the entire tray with fabric.

Scale the tray down a bit and it becomes a drawer organizer. Scale it down even more, and it's a jewelry or make-up organizer. The uses are endless.

I hope you find this DIY helpful. Please leave comments and photos if you make one for yourself.


Sunday, February 12, 2012

Master Bedroom Makeover : : Walls are Painted

"The best laid schemes of mice and men, often go awry." - John Steinbeck

It was Kasey's birthday Saturday, so I didn't get started until late Saturday afternoon. Done properly, prepping walls takes longer than actually painting them, so I had a lot of work to do. Then, when I thought I was ready to begin painting the trim, I discovered I had bought oil-based paint. Sooo...I switched gears and began painting walls instead. The light coming into the room was very bright and it didn't take long to realize that the Barely Jade color we had chosen was hardly jade, it looked powder blue...Sean's least favorite color in the whole wide world. (Click here to see the before photos.)

Sunday morning, I drove to Home Depot and exchanged the oil paint for BEHR Premium Plus Ultra Pure White High-Gloss Enamel, an acrylic enamel. If you've never used an acrylic enamel, it takes a bit of getting used to. It has a thick consistency. You have to put it on kind of thick, but not so thick as to run. And once you get it on the woodwork, leave it alone. Don't try to re-brush it because it sets quickly and you'll make a mess. If you leave it alone, it will blend back into itself leaving a smooth finish.

Once I got the trim painted, I re-painted the wall next to the trim to create a nice, clean edge, then I applied a second coat of paint to the walls. I still have a few spots to touch up, but I'm pleased with the outcome. Sean and I both struggled with the fact that our room was a pale blue color, but as the sun went down and the incandescent lights were turned on, it was the pale greenish color we expected. I think once we install white crown molding and get the dark brown floors in and bring some more accents into the room, the wall color will take on a supporting role instead of playing the lead.

master bedroom makeover Glidden Barely Jade pale blue walls

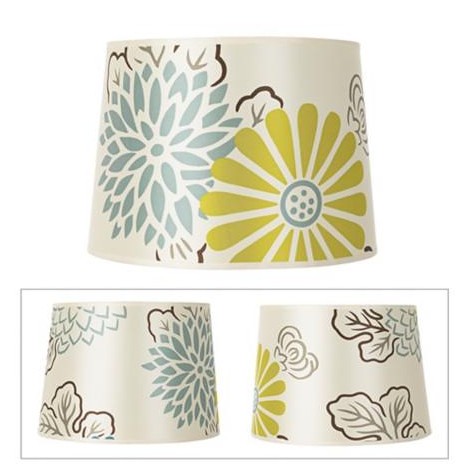
Now I'm exploring options for all the finishing touches in the room, starting with new lamps. Since I plan on going white with the bed linens, I think bringing in lamps with bold, graphic design could be interesting. This Lights Up! Kimono Shade from Lamps Plus is bold in its simplicity.

Lamps Plus Lights Up Kimono Shade

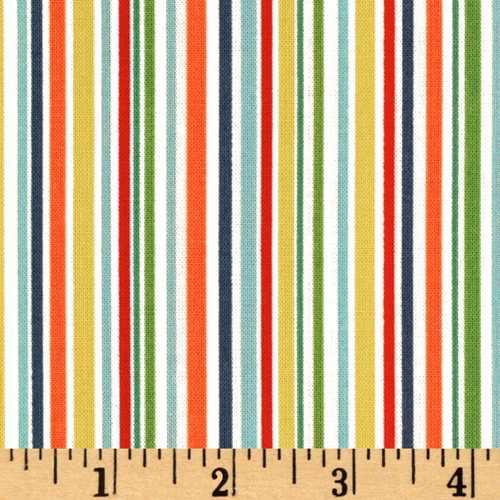
There are some great fabrics on the market, so maybe I'll create my own custom drum shades to top the bright red, glass lamps we already own. I'm in LOVE with this print I found on Fabric.com It's called Wrenly Wren Gypsy White by Valori Wells. I not only love all the colors and the retro feel of the design, but it features the cutest little birds. And best of all, Sean likes it! I like Michael Miller's Mini Mikes Slender Stripe Retro as a coordinating design. I've attempted to show them to scale. I could use them to create the cushion and accent pillows for the window seat we're going to build.

Valori Wells Wrenly Wren Gypsy White EK-791 fabric

Michael-Miller-Mini-Mikes-Slender-Stripe-Retro-EH-258-fabric-500

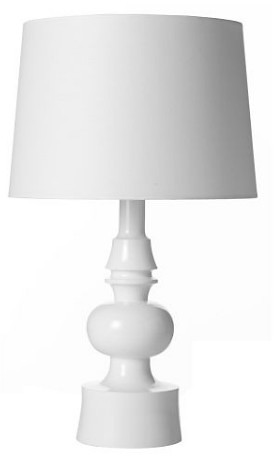
Or maybe we could go all white, like this turned lamp from West Elm

West Elm Turned Table Lamp

or the Zing lamp from Crate & Barrel, continuing the minimal theme. Have I mentioned that I love Crate & Barrel?

Zing White Table Lamp Crate and Barrel

We're also looking at options for the built in bookshelves. Sean can build them, but if we can buy some at an affordable price, that would be ideal.

The Victorian ceiling fan needs to be replaced with something more sleek like this contemporary Hunter 52 in. from Home Depot. I know interior design experts poo-poo ceiling fans, but we live in South Louisiana and I'm almost 45 years old. I need a ceiling fan. No ifs, ands, or buts about it. Case closed.

Hunter 52 in Contemporary Onyx Bengal Ceiling Fan

Add our new bed and an area rug and it will be a wonderful place to retire to after a long day at work. If I only had a magic wand...but I don't. So we'll just continue doing a little at a time and I'll post our progress here.

Have a great week!

Thursday, February 9, 2012

Master Bedroom Makeover : : Let the Games Begin!

Since Winter has abandoned South Louisiana, we started spring-cleaning early. Not your average, run-of-the-mill cleaning. Oh no. We're talking major . Like carpeting. Yep, ripping it out. Our home was built circa 1997, but we bought it in 2005. And it's time to make it "ours". So, if we're ripping out the carpeting, what better time to paint, right? And what about that archway between the living room and the dining area? Let's get rid of that, too! Oh,and the big plate glass mirrors in the bathrooms. Let's frame them. And what about...You can see what kind of year this is going to be.

I've decided to chronicle our adventures as Weekend Warriors so that maybe I can inspire others to do the same. After all, it's other people's blogs (and years of HGTV) that have given me the confidence that we can do it ourselves.

Our to-do list is long, so we have come up with a strategy. We've never installed wood floors, so we're going to start in our bedroom, then work our way out to the living room and then into the dining area. The plan is to know what we're doing by the time we're finished with the bedroom. Pretty smart, huh?

So here's our room, ready for the carpet-ectomy.

master bedroom with mustard gold walls (before)

...and here it is with a section of carpet gone.

master bedroom with mustard gold walls and partially removed carpeting (before)

...and finally, bare concrete.

master bedroom with mustard gold walls after removing carpet (before)

There's so much to do in this room. I can't wait!

First, the walls are going from the mustard gold color to a calming, watery blueish-green. It's going to look so nice with glossy white trim (yep, it's getting repainted, too). We agreed on Glidden's Duo Paint & Primer Barely Jade in a flat finish, which we picked up from Home Depot. It won't be long before we're on a first name basis with their employees. We go to the Broussard location and have had great customer service.

Glidden-Barely-Jade-Paint-color-and-coordinating-colors

Our furniture has a dark coffee finish that is just going to pop against the color. I think the watery color on the walls combined with the dark woods gives it a spa-like feeling.

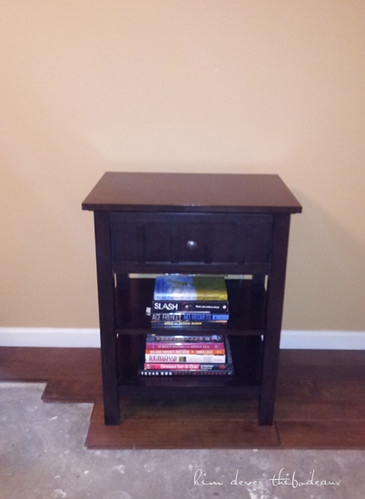
I painted a small portion of the wall and staged a nightstand in front of it for effect. I should note that the paint went on nicely and I got one-coat coverage, which I hadn't expected given how dark the wall color is.

IMG_3490-web-watermark

For the floors, we selected Virginia Mill Works Engineered Handscraped 1/2" x 5" Potomac Plank. The hand-scraping gives it a wavy, worn surface and the satin finish will stand up to the dogs. We purchased the flooring from Lumber Liquidators in Broussard, Louisiana. They are open late until 7:00 p.m. on Thursdays and the staff is very friendly and helpful. We thought we would have to settle for laminate flooring but learned that we could actually afford real wood plank flooring. Best of all, we got 18 months interest-free financing!

Virginia Mill Works Engineered Potomac Plank Handscraped flooring

I staged a nightstand with a few planks to get an idea of what it will look like. The color is a bit off in this photo since I shot it with my phone. The LED flash is cool so the nightstand looks purple. I just don't feel like color correcting it. Don't judge.

20120205_165056-web-watermark

Once we get the walls painted and the flooring installed, Sean is going to construct built-in bookcases with cabinets at the bottom and a window seat along the front wall. We'll give it a nice coat of white paint so that it becomes an architectural detail in the room. Then we'll finish off the room with white crown molding - a detail that is missing throughout our entire home.

I'm going to re-frame the girls' portraits and my wedding portrait in sleek wood frames and relocate them. Over the bed, I'm going to hang three individual matted, framed prints created from this one photo. I'm sure that project will warrant its own blog entry.

Photo Gumbo Studio cypress trees swamp Calm Before the Storm

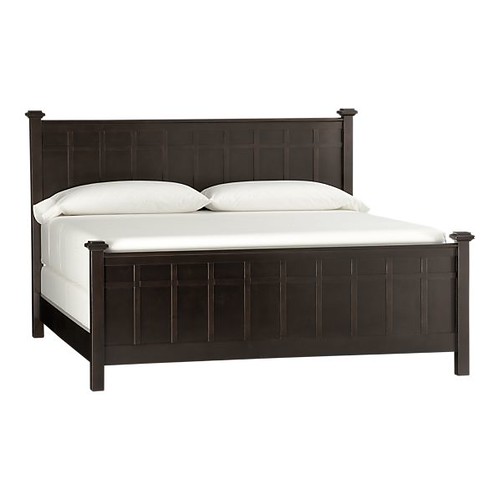
When the room is complete, we're going to reward ourselves by finally purchasing the bed that matches our dresser and nightstands. I don't particularly care for matched furniture, but my husband is a stickler about matching furniture and symmetry and that's OK, too. If there's a secret to being married for 22 years as we have, it's learning how to compromise. Here's what the bed looks like. It's part of Crate and Barrel's Brighton Collection.

BrightonCoffeeBedKingF10LargeCrateandBarrel

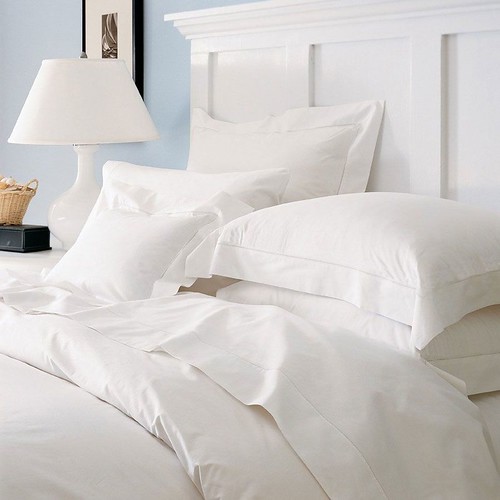
To keep that spa-like feeling, I think I'll top it off with crisp, classic white linens like these from Sferra, but mine will probably come from Ross. You can't beat their prices. I mean, you could pay more, but why? I love how fresh white bedding looks and with our dogs we need something that can be laundered often and still look great. If they're good enough for the finest hotels, they're good enough for our new master retreat!

SFERRA Sereno Sheets

So there you have it, our initiation into the Weekend Warrior Club. This is going to be so much fun! Are you feeling it?