Friday, November 21, 2008

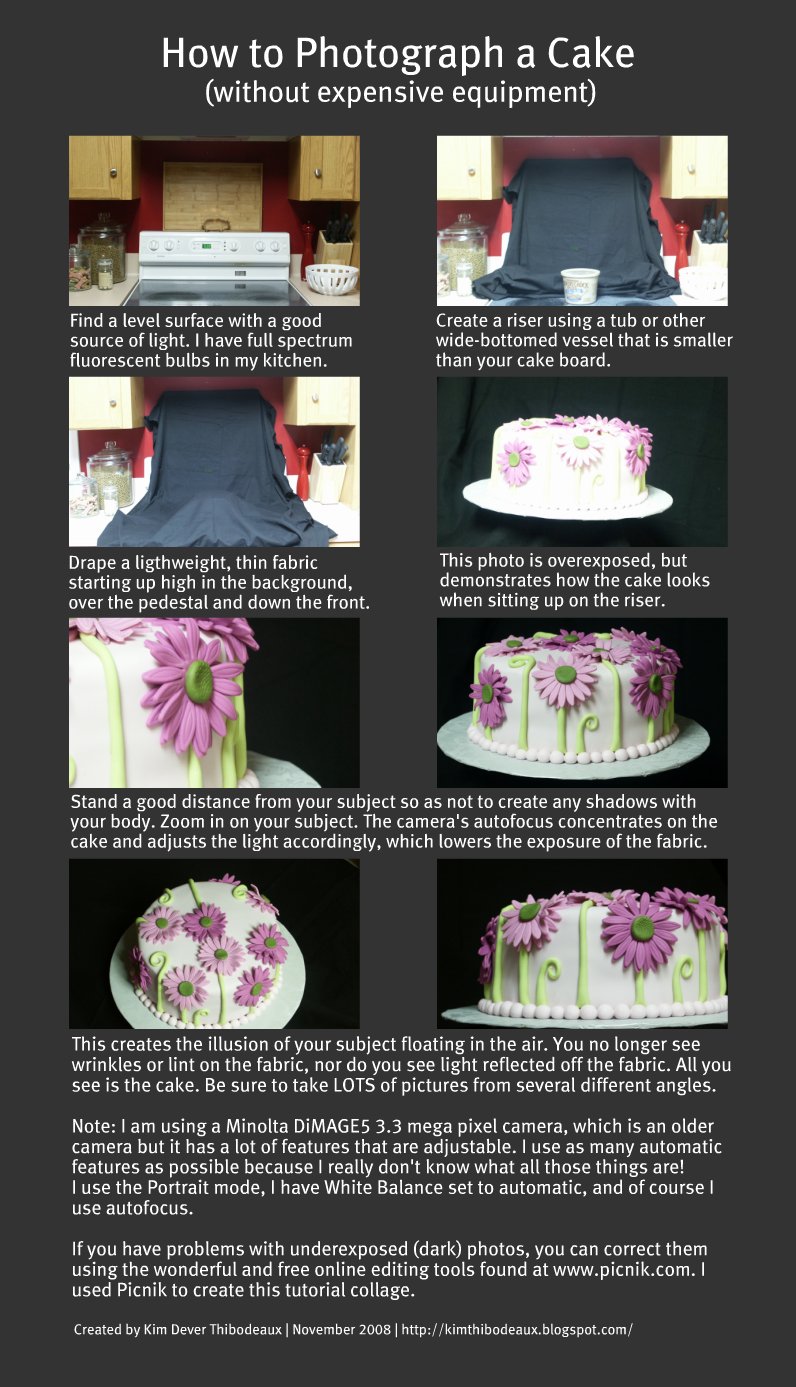
How to Photograph a Cake (without expensive equipment)

While I always enjoy compliments on my cakes and cookies, I've recently begun to get many compliments on may cake and cookie photography. Being a practical and frugal person (interpreted as "cheap"), I'm always looking for creative solutions.

After completing my most recent cake, I decided to try something new when it came time to photograph it. I recently installed full spectrum bulbs in the fluorescent ceiling fixture in my kitchen, which has improved my ability to shoot without a flash. Throw in an empty butter tub and a $2.00 scrap of fabric and voila, I've got some really nice photos. Read more about my Fuchsia Gerbera Daisy Cake.


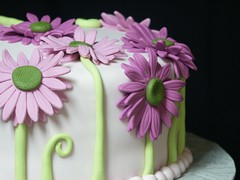
Fuchsia Gerbera Daisy Cake

Fuchsia Gerbera Daisy Cake
This is another version of the cake I fell in love with on www.pinkcakebox.com. You can click here to see the first one I did, which was also my first fondant cake and featured peachy-pink flowers. This is my fourth try at covering a cake in fondant, but I'm still not sold on it. I guess I just need more practice before I can be comfortable with the whole process.

The cake is three, 1-inch layers of German chocolate cake. I made a traditional cooked filling with coconut and pecans. The outside of the cake was frosted with chocolate frosting I made from Ghirardelli sweetened chocolate powder, then it was covered in vanilla fondant.

The "pearls" around the border and the green stems are both made of hand-rolled fondant. The flowers are gum paste. The fondant for the stems was colored with Americolor Electric Green. I used a little bit of Americolor Fuchsia to color the fondant that covers the cake. I added a little more color for the lighter flowers and then added a bit more for the darker flowers.

Feel free to contact me if you have any questions about the techniques I used to make this cake.

Wednesday, November 12, 2008

Our 19th Wedding Anniversary

"...what thwarts us and demands of us the greatest effort is also what can teach us most." --- Matthew Arnold

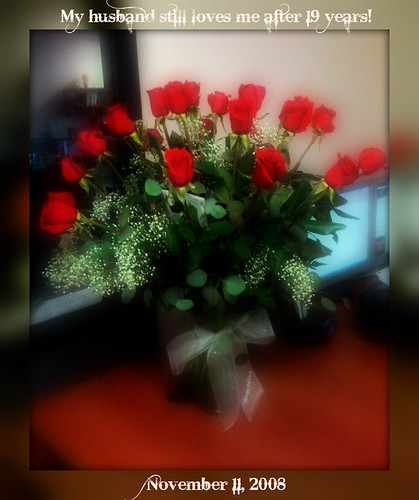
Yesterday, November 11th, was our 19th wedding anniversary. I have to admit that it hasn't always been easy, but I have learned a lot along the way. On this year's anniversary I learned that my husband can still surprise me because I did not expect to receive flowers on my anniversary, yet I did. I received the most beautiful bouquet of 19 perfect red roses. Roses that were so perfect they didn't look real. The card read, "So far, so good. Love, Me".

Tuesday, November 11, 2008

Grandpa is 93 years young!

My paternal grandfather, Harvey Dever, turned 93 on November 4th. We got together at his house the following Sunday to celebrate.

Since he loves banana cake, I took the opportunity to try my maternal grandmother's banana cake recipe for the first time. And, oh my! Why did I wait so long? It was delicious. Basically, it's a white cake with mashed bananas and ground pecans added to it. The filling consists of well-sugared, sliced bananas. Then you frost it with a simple buttercream frosting to which you add a mashed banana. I then coated it with toasted pecans. Yum!

Of course I brought my scratch-baked carrot cake, because it is always a hit. I decorated it with flowers in autumn-inspired tones.
But, not to leave the kids out, I made dirt cupcakes with gummy worms. They were filled with a mousse made from chocolate pudding, cream cheese, butter, powdered sugar, and Cool Whip. They were enjoyed by kids and grown-ups alike! In fact, I made so much filling that I served it up in a big bowl. Grandpa ate two heaping servings as seen in the slideshow below.

Happy Birthday, Grandpa!


Sunday, November 2, 2008

Baptism Cake for Baby Boy

A friend asked me to make her baby's baptism cake. She left the design up to me. I searched for ideas, but nothing really caught my eye.

In the meantime, I attended the Louisiana ICES Day of Sharing. The theme for the day was Glitz & Glamor. We saw several demonstrations, but I was most interested in the one presented by The Two Sweet Sisters from St. Martinville, Louisiana. They showed us how to create a pattern on fondant using a diamond-shaped cutter. They then piped small, royal icing pearls at the intersections of the lines and painted the pearls using super pearl dust. They also showed us how to create strands of pearls using silicone molds. I was so intrigued by what they did that I ordered the supplies a couple of days later.


As the date drew near for me to make the cake, I decided that the cake definitely needed to be covered in fondant since it was traveling to New Orleans. I decided I would try my luck at recreating the beautiful quilted pattern embellished with royal icing pearls. I knew I wanted the cake to be a light blue. But I wasn't sure what was going to go on top of the cake.

The flavor of cake was easy to decide. I baked three, 9" white almond sour cream cakes. When the time came to assemble them, I torted them into six separate layers. I filled them with bavarian cream filling. I covered the cake with a smooth coat of buttercream frosting.

I used Americolor Sky Blue to color the fondant. I immediately knew that I had chosen the wrong color to achieve a pale blue effect. Instead, what I got was a blue that was close to the color of a Tiffany gift box. Pretty, but was it too feminine? Too late to turn back now.

This was my third time covering a cake in fondant. It took me longer than it should have, but I was relatively pleased with the outcome. I then began pressing the diamond cutter into the sides of the cake to create the diamond pattern. The fondant had already begun to set up so I had to press harder than expected to get the cutter to leave a good impression, which caused the buttercream to ooze out. This also cause the fondant to extend lower than the cake board so that I had to trim it a second time. OK. Fine. Lesson learned.

Once I had the pattern all the way around the cake, I placed the cake on the foil-covered cake board. I then piped royal icing pearls using a #2 tip. I piped a section at a time, stopping to go back and flatten the dots into round balls using a dampened paint brush. I then brushed super pearl dust into the pearl strand mold and pressed white fondant into the mold. The result was strands of pre-dusted pearls. The strands tended to break apart, but that wasn't a problem. I held the pearls in place with a bit of royal icing on the cake board.

Then I had to decide what to do on the top of the cake. I decided to cut a circle of white fondant and pipe the baby's initials on it, then surround the plaque with pearls. This proved to be a little challenging, but it was easier than trying to write on the cake.

For the finishing touch, I used lemon extract mixed with super pearl dust to paint all the piped pearls as well as the plaque.

My friend arrived shortly after I had finished my usual post-decorating photo shoot. She was very pleased with the cake. I made her husband promise to drive safely so that the cake wouldn't be destroyed on the way. We had a good laugh and agreed that even if it got smashed, it would still taste good!