Showing posts with label baby. Show all posts

Thursday, January 22, 2009

Polka Dot Baby Shower Cake

I was asked to make a cake to match the shower invitations, which were light blue with a polka dot border in blue, green, yellow, and white. My plans were to frost the cake then add circle fondant appliqués. But I've learned that simple graphic design means the slightest imperfections are magnified. So, rather than struggle to achieve a perfect coat of frosting, I frosted the cake as smoothly as I could and I covered it in pale blue fondant. I then mixed the other colors to match the dots on the card. I cut the dots using a cookie cutter. They looked perfect...until I tried picking them up. They kept stretching out of shape. So I let them sit a while until they stiffened a bit, then I gently lifted them and placed them on the cake.

I intended to create concentric rows of dots, but the diminishing circumference meant that the dots didn't align properly. So I went with a single row around the top of the cake. I cut a large circle of white fondant for the center plaque and mixed some frosting and piping gel with blue color to pipe the personalized message.

The cake itself was three 10-inch rounds made using the white almond sour cream recipe, but instead of using white cake mix, I used French vanilla. It tasted wonderful. I filled the layers with Bavarian cream filling. I frosted the cake with white butter cream frosting. The fondant was vanilla flavored.

I was told that everyone thought the cake looked great and was delicious.
Blue Green Yellow Polka Dot Cake

Sunday, November 2, 2008

Baptism Cake for Baby Boy

A friend asked me to make her baby's baptism cake. She left the design up to me. I searched for ideas, but nothing really caught my eye.

In the meantime, I attended the Louisiana ICES Day of Sharing. The theme for the day was Glitz & Glamor. We saw several demonstrations, but I was most interested in the one presented by The Two Sweet Sisters from St. Martinville, Louisiana. They showed us how to create a pattern on fondant using a diamond-shaped cutter. They then piped small, royal icing pearls at the intersections of the lines and painted the pearls using super pearl dust. They also showed us how to create strands of pearls using silicone molds. I was so intrigued by what they did that I ordered the supplies a couple of days later.


As the date drew near for me to make the cake, I decided that the cake definitely needed to be covered in fondant since it was traveling to New Orleans. I decided I would try my luck at recreating the beautiful quilted pattern embellished with royal icing pearls. I knew I wanted the cake to be a light blue. But I wasn't sure what was going to go on top of the cake.

The flavor of cake was easy to decide. I baked three, 9" white almond sour cream cakes. When the time came to assemble them, I torted them into six separate layers. I filled them with bavarian cream filling. I covered the cake with a smooth coat of buttercream frosting.

I used Americolor Sky Blue to color the fondant. I immediately knew that I had chosen the wrong color to achieve a pale blue effect. Instead, what I got was a blue that was close to the color of a Tiffany gift box. Pretty, but was it too feminine? Too late to turn back now.

This was my third time covering a cake in fondant. It took me longer than it should have, but I was relatively pleased with the outcome. I then began pressing the diamond cutter into the sides of the cake to create the diamond pattern. The fondant had already begun to set up so I had to press harder than expected to get the cutter to leave a good impression, which caused the buttercream to ooze out. This also cause the fondant to extend lower than the cake board so that I had to trim it a second time. OK. Fine. Lesson learned.

Once I had the pattern all the way around the cake, I placed the cake on the foil-covered cake board. I then piped royal icing pearls using a #2 tip. I piped a section at a time, stopping to go back and flatten the dots into round balls using a dampened paint brush. I then brushed super pearl dust into the pearl strand mold and pressed white fondant into the mold. The result was strands of pre-dusted pearls. The strands tended to break apart, but that wasn't a problem. I held the pearls in place with a bit of royal icing on the cake board.

Then I had to decide what to do on the top of the cake. I decided to cut a circle of white fondant and pipe the baby's initials on it, then surround the plaque with pearls. This proved to be a little challenging, but it was easier than trying to write on the cake.

For the finishing touch, I used lemon extract mixed with super pearl dust to paint all the piped pearls as well as the plaque.

My friend arrived shortly after I had finished my usual post-decorating photo shoot. She was very pleased with the cake. I made her husband promise to drive safely so that the cake wouldn't be destroyed on the way. We had a good laugh and agreed that even if it got smashed, it would still taste good!

Friday, August 8, 2008

Testing the Boundaries of Friendship, or Teaching a Friend How to Decorate Cookies

Practice Cookies
Want to learn more about someone? Try to teach them something.

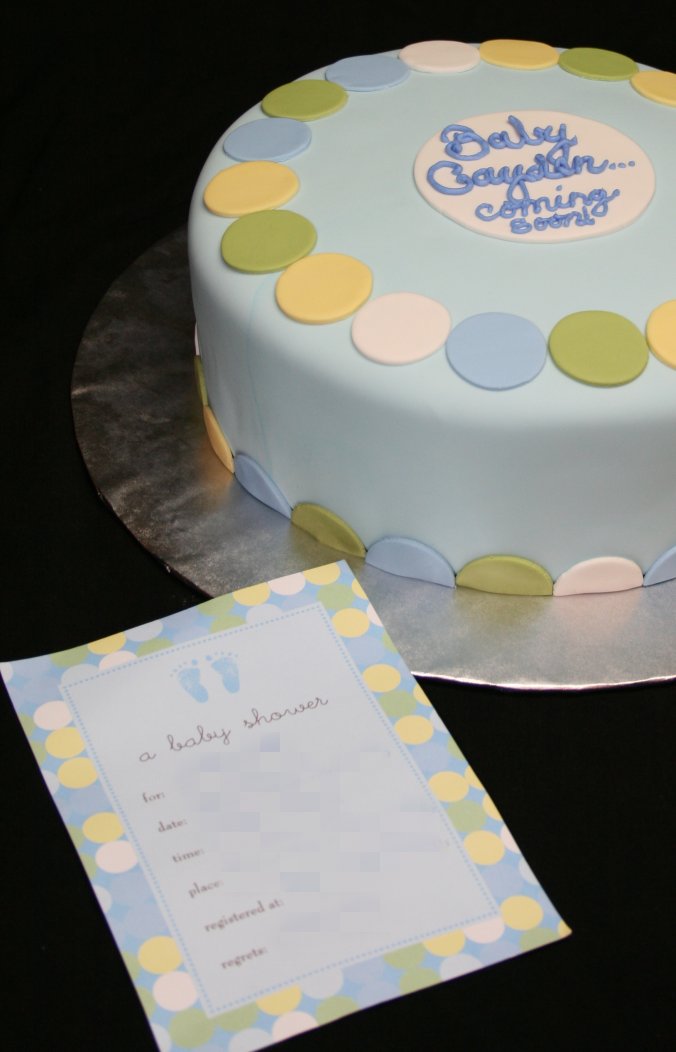
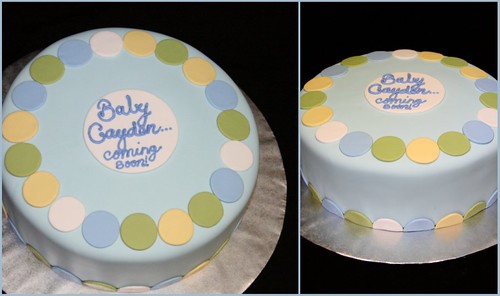
My girlfriend Sandi was telling me about a baby shower she was going to host. The color scheme was going to be pink, brown, and white. Fun!

She tells me all about her ideas for decorating the venue. And, since I'm always looking for an excuse to try new cookie designs, I thought this was a great opportunity, so I offered to bake some cookies. We were discussing this on a Wednesday, or so, and the shower was the coming Sunday so I told her I couldn't make any promises, but I would try to get them made by Saturday evening.

But Sandi had a better idea. "How about if I come over and help you?"

Uhm..."OK. Yeah. That could be fun. Maybe you could help me."

Now I'm an easy-going, patient person, but there are some things that I am particular about. The words "bossy" and "control freak" have been used lightheartedly by friends and coworkers. And I'll admit that I have my quirks. But, I know that whenever Sandi and I get together, we always have fun. The cookies were just for practice and no one was actually paying me for them, so I figured, what the heck? Let's do it. We agreed to get together Saturday since her son and my daughters had been invited to sleepovers, so we would be kid-free for the evening.

Sandy arrived at my house at 5:30 Saturday afternoon, with enthusiasm and excitement, ready to take on the world of cookie decorating.

Long story short. I am a very patient person. Sandi is not.

I have rules when it comes to some things. Sandi does not.

But we pressed on. We agreed that I would outline and Sandi would flood. And she did pretty well for it being her first time. Once the flood icing had crusted, we began to apply the detail outlines to the cookies, which brought them to life.

By the end of the evening, make that 3:00 Sunday morning, Sandi made it very clear that I was a much more patient person than she was. I, in turn, made it clear to Sandi that if the day ever came that I was baking and decorating cookies for a living, we probably wouldn't be working side by side. We had a good laugh.

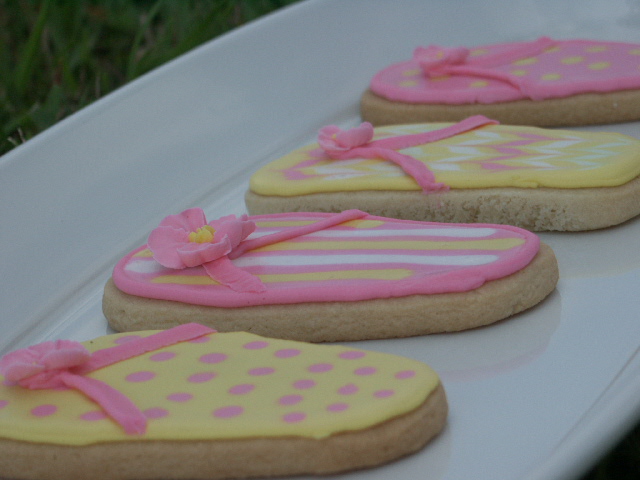
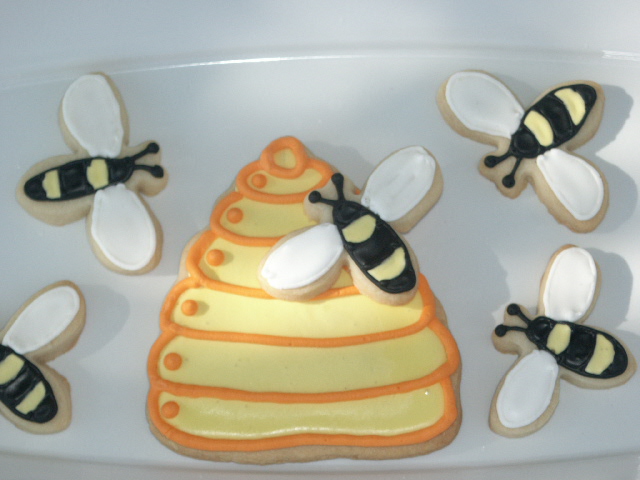
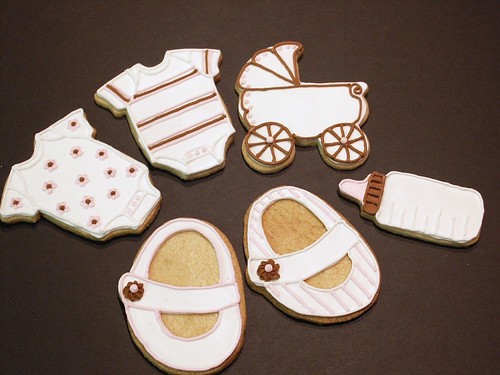
In the end, the cookies were very cute. Well, most of them were. If you didn't look at them up close.

I asked Sandi how the shower went and she said that everyone loved the cookies but when she said that she and a friend had made them, everyone looked at her suspiciously...

On a serious note, we did have fun. Sandi learned something new and I got to spend an evening with a dear friend. Something that doesn't happen often because while we are not only friends, but coworkers, we don't spend much time together at work or otherwise.

I think the next time we get together it will be to sit on the patio and drink adult beverages while my husband does the cooking!

Cookie Notes: I own cutters for the onesies, baby buggy, and baby bottle. The shoes were inspired by Susan Caliendo's shoe cookies found on her website, Rolling Pin Productions. They were handcut from a template drawn on cardstock. The striped onesie is also inspired by one of Susan's designs.

My sugar cookies were baked using the cookie dough recipe found on page 120 of The Flour Pot Cookie Book by Margie and Abbey Greenberg. Not only does it perform well, but it tastes great, too, which is very important to me.

I use royal icing to decorate my cookies and the recipe I prefer is known on Cake Central as Antonia74 Royal Icing. You can visit her website, Marmalade Cake Company.

Sunday, June 15, 2008

My first royal icing decorated sugar cookies!

After two months of research, I finally felt confident enough to try my hand at decorating sugar cookies. I owe a big Thank You to CakeCentral.com for all the inspiration I found while reading user posts and viewing the image gallery. I also checked out lots of websites like www.nancysfancycookies.com , www.rollingpinproductions.com , and www.alissweettreats.com , and read several cake and cookie decorating books.

For these cookies, I used the No Fail Sugar Cookie recipe and Antonia74 royal icing recipe found on CakeCentral.com
You can click here to view additional photos.