Showing posts with label cake. Show all posts

Sunday, February 22, 2009

Happy Birthday, Korey!

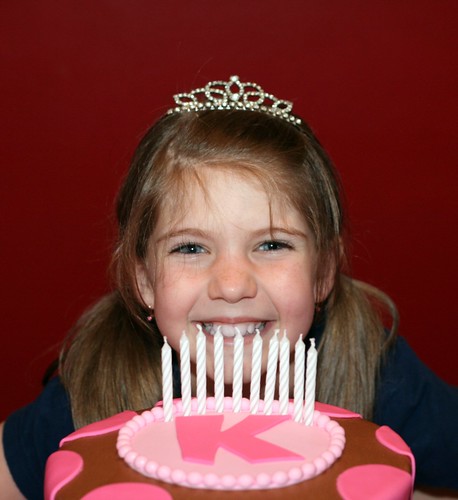
Pink Polka Dot Chocolate Cake

Korey turned 10 on February 17th. She wanted her party decorations to be pink and brown. For her cake, she wanted chocolate with pink polka dots and a "K" in the middle, just like the one I put on Kasey's cake.

I baked three 8" layers of Devil's Food pound cake and used Bavarian cream filling between the layers. I frosted the cake with homemade chocolate frosting then decorated it with bright pink fondant polka dots. I finished it off with light pink pearls and a circular plaque with a large, bright pink "K" in the center.

Just as for Kasey's party, I displayed the cake on a glass cake pedestal rimmed in silver. It's the same one that was used for our cakes when we were kids, so it holds a special meaning to me.

She loved her cake and her friends were amazed. Now they all want me to make their next birthday cake.

Happy Birthday, Korey!

Friday, November 21, 2008

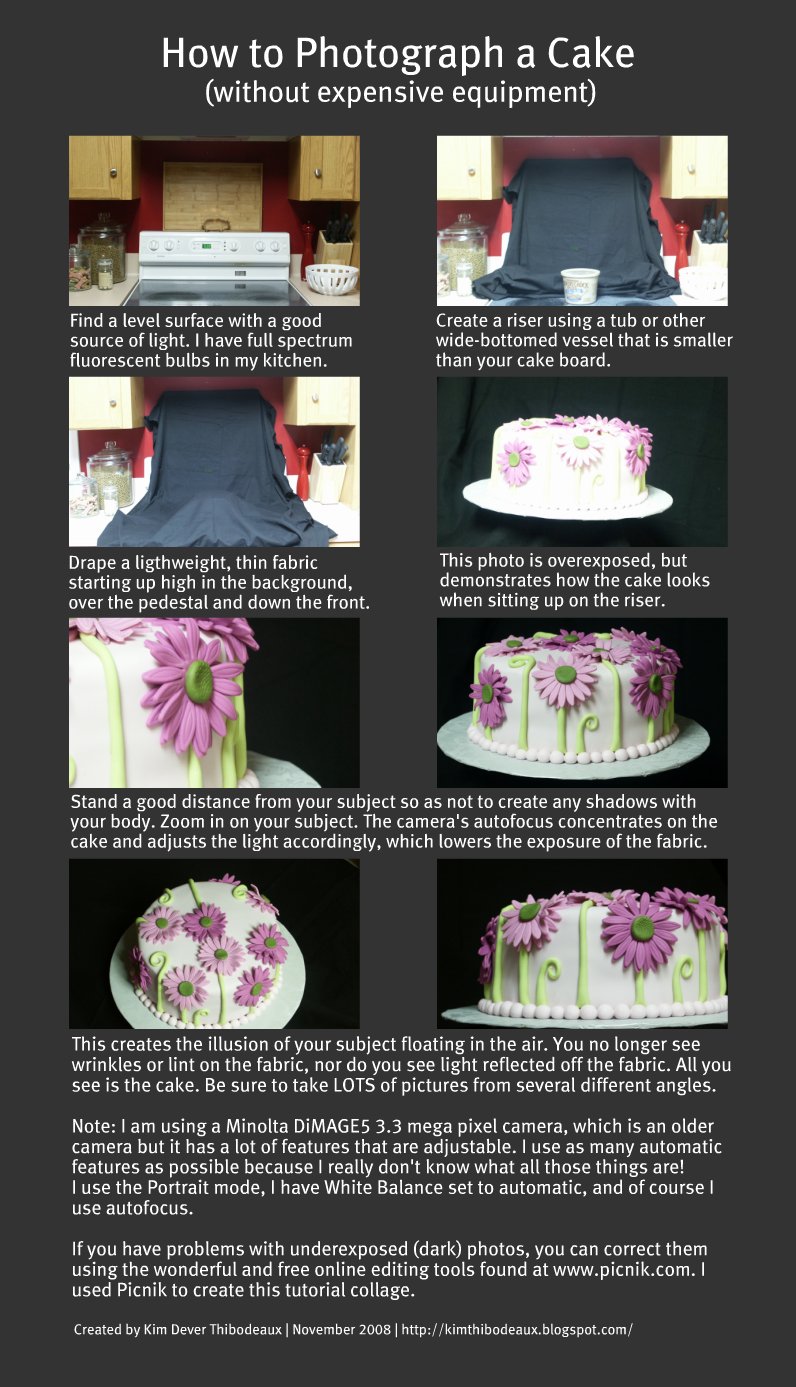
How to Photograph a Cake (without expensive equipment)

While I always enjoy compliments on my cakes and cookies, I've recently begun to get many compliments on may cake and cookie photography. Being a practical and frugal person (interpreted as "cheap"), I'm always looking for creative solutions.

After completing my most recent cake, I decided to try something new when it came time to photograph it. I recently installed full spectrum bulbs in the fluorescent ceiling fixture in my kitchen, which has improved my ability to shoot without a flash. Throw in an empty butter tub and a $2.00 scrap of fabric and voila, I've got some really nice photos. Read more about my Fuchsia Gerbera Daisy Cake.


Fuchsia Gerbera Daisy Cake

Fuchsia Gerbera Daisy Cake
This is another version of the cake I fell in love with on www.pinkcakebox.com. You can click here to see the first one I did, which was also my first fondant cake and featured peachy-pink flowers. This is my fourth try at covering a cake in fondant, but I'm still not sold on it. I guess I just need more practice before I can be comfortable with the whole process.

The cake is three, 1-inch layers of German chocolate cake. I made a traditional cooked filling with coconut and pecans. The outside of the cake was frosted with chocolate frosting I made from Ghirardelli sweetened chocolate powder, then it was covered in vanilla fondant.

The "pearls" around the border and the green stems are both made of hand-rolled fondant. The flowers are gum paste. The fondant for the stems was colored with Americolor Electric Green. I used a little bit of Americolor Fuchsia to color the fondant that covers the cake. I added a little more color for the lighter flowers and then added a bit more for the darker flowers.

Feel free to contact me if you have any questions about the techniques I used to make this cake.

Sunday, November 2, 2008

Baptism Cake for Baby Boy

A friend asked me to make her baby's baptism cake. She left the design up to me. I searched for ideas, but nothing really caught my eye.

In the meantime, I attended the Louisiana ICES Day of Sharing. The theme for the day was Glitz & Glamor. We saw several demonstrations, but I was most interested in the one presented by The Two Sweet Sisters from St. Martinville, Louisiana. They showed us how to create a pattern on fondant using a diamond-shaped cutter. They then piped small, royal icing pearls at the intersections of the lines and painted the pearls using super pearl dust. They also showed us how to create strands of pearls using silicone molds. I was so intrigued by what they did that I ordered the supplies a couple of days later.


As the date drew near for me to make the cake, I decided that the cake definitely needed to be covered in fondant since it was traveling to New Orleans. I decided I would try my luck at recreating the beautiful quilted pattern embellished with royal icing pearls. I knew I wanted the cake to be a light blue. But I wasn't sure what was going to go on top of the cake.

The flavor of cake was easy to decide. I baked three, 9" white almond sour cream cakes. When the time came to assemble them, I torted them into six separate layers. I filled them with bavarian cream filling. I covered the cake with a smooth coat of buttercream frosting.

I used Americolor Sky Blue to color the fondant. I immediately knew that I had chosen the wrong color to achieve a pale blue effect. Instead, what I got was a blue that was close to the color of a Tiffany gift box. Pretty, but was it too feminine? Too late to turn back now.

This was my third time covering a cake in fondant. It took me longer than it should have, but I was relatively pleased with the outcome. I then began pressing the diamond cutter into the sides of the cake to create the diamond pattern. The fondant had already begun to set up so I had to press harder than expected to get the cutter to leave a good impression, which caused the buttercream to ooze out. This also cause the fondant to extend lower than the cake board so that I had to trim it a second time. OK. Fine. Lesson learned.

Once I had the pattern all the way around the cake, I placed the cake on the foil-covered cake board. I then piped royal icing pearls using a #2 tip. I piped a section at a time, stopping to go back and flatten the dots into round balls using a dampened paint brush. I then brushed super pearl dust into the pearl strand mold and pressed white fondant into the mold. The result was strands of pre-dusted pearls. The strands tended to break apart, but that wasn't a problem. I held the pearls in place with a bit of royal icing on the cake board.

Then I had to decide what to do on the top of the cake. I decided to cut a circle of white fondant and pipe the baby's initials on it, then surround the plaque with pearls. This proved to be a little challenging, but it was easier than trying to write on the cake.

For the finishing touch, I used lemon extract mixed with super pearl dust to paint all the piped pearls as well as the plaque.

My friend arrived shortly after I had finished my usual post-decorating photo shoot. She was very pleased with the cake. I made her husband promise to drive safely so that the cake wouldn't be destroyed on the way. We had a good laugh and agreed that even if it got smashed, it would still taste good!

Friday, October 31, 2008

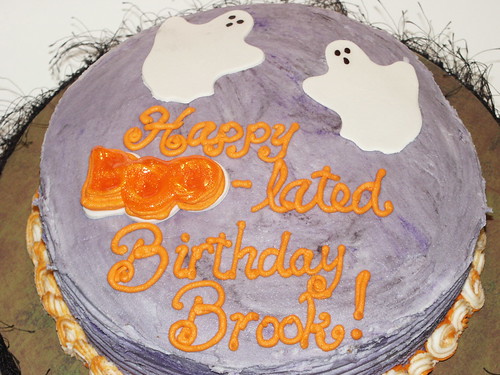
Happy Boo-lated Birthday, Happy Halloween & Happy Fall Y'all

Three more cakes in autumn and Halloween themes.

First is Brook's Boo-lated Birthday Cake. We were going to Brook & Sam's annual Halloween party so I offered to bring a cake, of course. Brook had just had a birthday, but didn't get to celebrate it so Sam asked me to make a birthday cake. Lemon is Brook's favorite so I baked a lemon pound cake with lemon filling and lemon buttercream frosting. I went with a Halloween design and I can't say I was happy with the final outcome. I was, however, happy with the custom cake stand that I made. But they enjoyed the cake with family the next day and said it was really good.

Halloween Cake

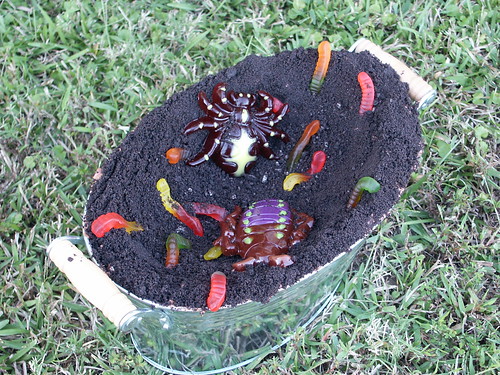
I also made this dirt cake, which I adorned with gummy worms and insects. I modified the filling recipe and added a bottom layer made of devil's food cake. It was actually delicious. The filling ended up being more of a chocolatey-cream cheese mousse! There was extra filling left over and we enjoyed it for several nights!

Halloween Dirt Cake

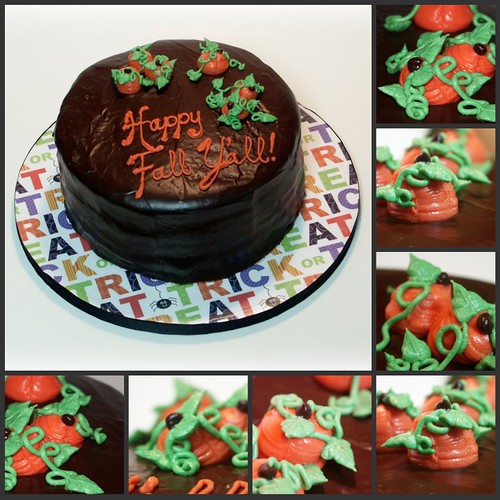
And finally, this is a dessert cake that I'm bringing to work for food day on Friday, which is also Halloween. It's an 8-inch devil's food cake with six layers of cake and chocolate bavarian cream filling. I frosted it with Ghirardelli chocolate frosting and then pourced Ghirardelli chocolate ganache over the entire cake. The decorations are buttercream and cream cheese frostings. Yummy!

Happy Fall Y'all

Wednesday, October 22, 2008

Autumn-Inspired Birthday Cake

This is another cake that I made for a coworker's birthday. Gum paste is a new medium for me, so I wanted to try something new.

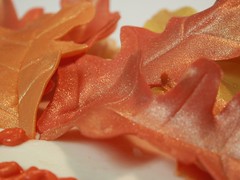
I used a cookie cutter for the small oak leaf. The other leaves were hand cut from a template. I found the clip art from Microsoft Office Online. (I love free stuff!) To make the leaves dry in a natural looking state, I crumpled up several foil sheets and layed them on a cookie sheet to create a very uneven surface. I cut out the leaves, used a ball tool to thin the edges on a foam sheet, then used a veining tool to create the veins. Then I creased them down the center and kind of folded the leaves along the veins then layed them in various positions on the foil hills and valleys. When they were dry enough to handle, I used a dry paintbrush to add gold and bronze lustre dusts to them. The leaves actually started out as vibrant shades of red, red-orange, and yellow. The lustre dusts softened the colors.

The cake is a 9", triple layer carrot cake, baked from scratch; filled and iced with an old fashioned, homemade cream cheese frosting - lots of buttah! Paula Deen would be proud. Based on techniques I've seen in Serious_Cakes' videos on YouTube, I used a #104 tip to stripe the sides and then I used a #18 star tip to create a seashell and C-scroll border around the bottom. I used the reverse shell technique (kind of) to form the border around the top of the cake.

I wasn't at work Monday because I was attending the local ICES Day of Sharing, which means I wasn't there when the cake was cut. But there was a little bit left Tuesday morning, so we enjoyed it for breakfast! Yummy in my tummy!

Thursday, October 9, 2008

Chocolate Ganache Birthday Cake


This cake was baked for the son of my friend, Tally, to celebrate his 14th birthday. It's a six-layer, devil's food cake with bavarian cream filling. I covered it with Ghirardelli chocolate frosting then poured chocolate ganache on top.

Yum!

Chocolate Ganache Birthday Cake

Bright Birthday Cake

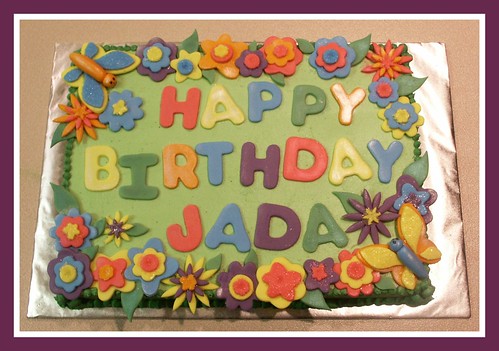
I baked this cake for the daughter of my friend and co-worker, Toni. She wanted a cake to match the party invitations.

It's an 11" x 15" single layer "cinnamon toast" cake. I used a recipe from Cupcakes by the Cake Doctor by Anne Byrne. Delicious! I coated the cake in buttercream frosting and decorated it with fondant appliques.

Bright Flowers Birthday Cake

Happy Birthday to Me!

My birthday was September 8th so of course I baked myself a birthday cake. I wanted to try something new and I definitely wanted buttercream frosting. I recently discovered Cupcake Cafe a wonderful, all-buttercream cake shop that does amazing cakes. I turned to them for inspiration and found a lovely wedding cake covered in lilacs (see tiered cake below).


I thought I would do my interpretation of that cake in a single tier, so I made a four-layer, french vanilla cake with red raspberry filling. I mixed a (too dark) shade of ivory buttercream and two shades of purple, some brown for stems and green for leaves. I wasn't sure how to actually make the flowers, so I experimented with a few tips and ended up with something completely different!

I don't think they are actually lilacs. Some people thought they were wisteria and others thought they were hydrangeas. (My kids thought they were grapes). But everyone thought the cake was beautiful and tasted great. In fact, it was pretty much devoured in one sitting.

All in all, I enjoyed my birthday celebration with family and friends. And I got the birthday cake I wanted because I baked it myself!


Sunday, August 24, 2008

Pink Petals Birthday Cake


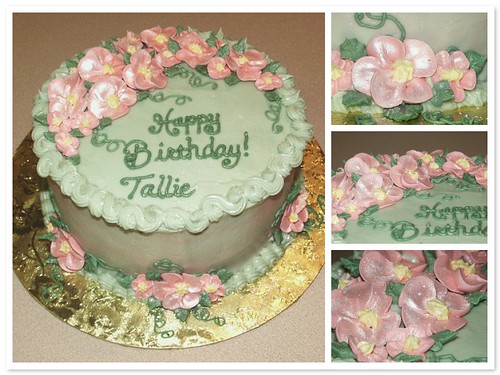
This is a carrot cake that a friend ordered for her own birthday. It's a triple-layer carrot cake filled and frosted with cream cheese frosting. I was free to decorate it as I wished, so I took the opportunity to try something new. I found this Lilly Pulitzer-style cake created by Laurie Lucov Wedding Cakes . I liked the pink and green combination and the whimsical design. I thought I could interpret it in a single layer cake.

But...the fates had a different idea. The chocolate transfers turned out horrible and my latticework looked even worse...I had to scrape off the latticework and re-smooth the cream cheese frosting...hence the marbled sides. I made a batch of royal icing and made the flowers, let them dry until they could be handled and arranged them on the cake. Once the cake was finished I thought something was missing, so I brushed it with shimmer dust.

Most importantly - Tallie loved it! Happy Birthday, Tallie!


Sunday, August 17, 2008

Happy birthday, Hubby!

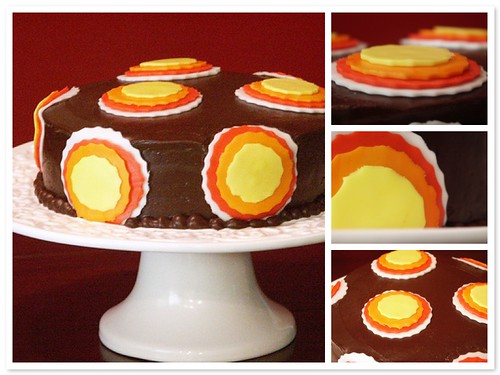
Bright Circles Birthday CakeToday is my husband's birthday so I made a cake just for him. It's an 8-inch, three layer, french vanilla cake. One layer of banana filling and one layer of red raspberry. He requested Duncan Hines Classic Chocolate frosting, so I obliged. One must choose their battles!

I hadn't worked with fondant before today, so I decided I would try it out. Since he is a barbecue fanatic, I mean "enthusiast", I was going to cut out flames. But I decided to keep it simple, so I figured I could try out my new set of circle cutters. I chose a white stoneware cake pedestal so I figured there needed to be some white on the cake to tie it all together.

Working with the fondant wasn't so difficult once I realized that I needed a little Crisco to keep the fondant pliable and prevent it from sticking to everything. I could have cleaned up the edges of the cutouts a bit better, but in the end I thought it turned out OK.

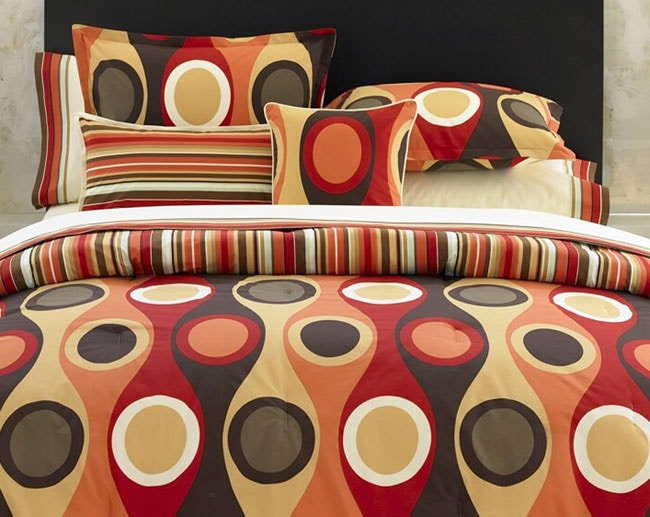
When I showed it to him, he laughed and asked if I had made it to coordinate with our comforter. And that's when I realized that the two were quite similar! And then he said that it wasn't really a birthday cake, it was a project cake. I told him it was indeed a birthday cake, but I had taken some creative license.

Most importantly, he said the cake was absolutely delicious and I could bake another one whenever I wanted to.

Hmmm...gotta start thinking about what design to try next!

Oh, and here's what our comforter looks like, if you were wondering. We got it from Overstock.com.


Wednesday, May 7, 2008

Ooh La La! Fleur de Lis Cake

Finished this cake tonight. It's a birthday cake for a coworker who likes fleur de lis.

It's a double layer, 9-inch devil's food filled with chocolate Bavarian cream. I frosted it with chocolate frosting made from the recipe found on the Ghirardelli powdered chocolate can. Very yummy! The fleur de lis appliques are made from colorflow, which I painted with gold luster dust. There are eight, 2-inch tall fleur de lis around the side of the cake.

The base of the cake is decorated with chocolate sprinkles. I chose not to embellish the top rim of the cake because I thought it would have detracted from the simplicity of the design.


View the entire Fleur de Lis set on Flickr!

Saturday, May 3, 2008

Glorious Ganache

This cake was very simple to make. It's a five layer yellow cake with Bavarian cream filling. It is covered in buttercream frosting and drizzled with chocolate ganache.


Ganache with Panache: Sandi's Birthday Cake

I surprised my friend, Sandi, with a chocolate cake for her birthday. She loves chocolate and chocolate covered strawberries, so I pulled out all the stops and invented a cake just for her.

It was a devil's food cake with chocolate Bavarian cream filling. I bought a can of Ghirardelli chocolate powder and made chocolate frosting using the recipe found on the label. It tasted fabulous! I then poured chocolate ganache over the entire cake. It was supposed to flow over the cake and drip down the sides but I learned an important lesson. Don't try this on a cake you have just removed from the refrigerator! The chocolate cools quickly and doesn't flow.


Then, I dipped fresh strawberries in the ganache and clustered them on top of the cake and placed them around the base of the cake. I drizzled them with melted white chocolate. Then I tried writing on the cake with the melted white chocolate. This didn't exactly work, as you can see.


But...the cake TASTED fantastic! One person said that each chocolate area was a little adventure. An adventure in chocolate. Sandi has named it her official birthday cake and said I must deliver one to her for her birthday every year.


Sunflower Cakes & Cupcakes

I wanted to bake a cake for Easter, but I wanted it to be something unexpected - no bunnies or eggs. I decided sunflowers would be very spring like. A quick Google search found Debbie Weaver's instructions for making sunflowers for decorating cupcakes or cakes. I baked an 8" three-layer yellow pound cake, filled with Bavarian cream. I frosted it with buttercream and followed her instructions and this was the final product. I used dark chocolate cocoa powder to help achieve the dark brown color of the seeds. The great thing was that it tasted as good as it looked. Once I convinced everyone it was OK to cut it, they devoured it! You can click here to view all of my sunflower cake and cupcake photos.

A friend of mine, Robin, saw my first sunflower cake pictures and asked if I would decorate a cake for her mother's birthday party. She brought me two 9" round lemon-flavored cakes. I torted them and filled them with lemon curd. I frosted them in a lemon-cream cheese frosting. I used buttercream for the flowers. You can click here to see all the photos.


Robin's sister-in-law, Sam, loves sunflowers. I had to bake some cakes the following Sunday, one of which was a sunflower cake for a friend and co-worker, Debbie. So I used the extra cake batter to make cupcakes for Sam. Debbie's cake was a square lemon cake. I filled it and frosted it with lemon buttercream frosting. It was a belated Administration Professionals Appreciation day cake.

Wilton Cake Decorating: Course 2

In this course we learned to make birds using the colorflow technique and we made flowers using royal icing. In the first three classes, we made flowers that we brought home to dry. For the final class, we brought a cake crumb coated in buttercream and frosted on top.

We learned to cover the sides with the basketweave technique. This is actually quite easy once you get into a rhythm. Then we trimmed the bottom using the rope technique. I trimmed the top edge with reverse shells. Then we arranged all the flowers and the birds we made in the previous classes.
My flowers were brighter than I would have liked, but I was still happy with the final product. I would like to try making a chocolate cake with chocolate basketweave around the sides. I think I'd like to decorate the top with chocolate molded leaves and chocolate covered strawberries!


Wilton Cake Decorating: Course 1

I recently took Wilton courses 1 & 2 in cake decorating. We learned to decorate cakes using buttercream icing, royal icing, and colorflow.

Our first assignment was to bake a cake using a character pan and a star tip. I chose a purse because I wanted something with as few colors possible. This technique is easy, but it causes my hand to cramp.


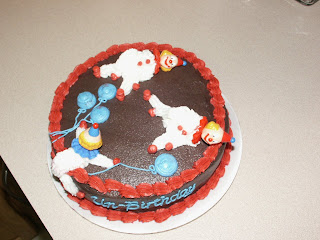
Our second assignment was to learn how to make a shell border, write freehand, and pipe characters from icing. We had to make clowns. I'm not a fan of clowns so I wasn't thrilled about the assignment. Basically, the trunks, arms, and legs of the clowns were thickly piped frosting with no structural support. The heads were plastic picks.

The frosting was still wet when we left class and I had a pretty long drive home. I think I hit every pothole along the way and knew there was no way the two sitting clowns would still be upright.
When I got home we all had a good laugh because the sitting clowns had fallen down. They looked drunk. The third clown looked like he just didn't have the strength to climb to the top of the cake! I dubbed it my "Drunk Ass Clowns Cake" and everyone who sees it, loves it.


Our final class had us decorate a cake with basic buttercream roses. Making a good rose is quite a challenge, but I think I did OK.