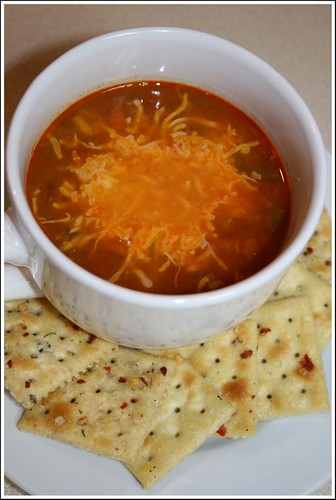
I love homemade vegetable beef soup. It's one of those comfort foods that just makes you feel all warm and fuzzy inside. My mother used to make it for us and store it in the fridge in a large Tupperware pitcher so that when we got home from school we could pour some in a mug and stick it in the microwave. It was a great after school snack on
 We always ate our vegetable soup with saltine crackers, but when I got married, my husband introduced me to soup with cornbread on the side. His mother gave us her soup recipe and over the years I've tweaked it a bit. In fact, I rarely make it the same way twice. I usually just make it with what I have on hand. I've decided I don't like potatoes in my soup. I'd rather fill up on beef. Big, juicy chunks of beef. And, I always make a huge pot (or two) and freeze it for easy weeknight meals.
We don't add any pasta to our soup. My husband doesn't like it and I don't really care either way. I prefer cabbage in it, but he doesn't really care for cabbage. Sometimes I finely chop the cabbage so that you can't distinguish it from onions and he's none the wiser. My mother used to put brussels sprouts in hers. Uh...no...no brussels sprouts in my soup.
People are always asking us for recipes and some we share...some we don't. I have no problem sharing my homemade soup recipe. There's isn't really anything special about it. And, as I said earlier, I never make it the same way twice. In fact, once I browned a bunch of ground meat and used it in place of chopped beef. Another time, I didn't feel like going to the store so I left the meat out completely for a great vegetable soup. I encourage anyone trying it to put their own spin on it, too.
So, without further ado, here how I made it this time.
Ingredients for 20 quarts of soup
2 - 48 oz containers of Low Sodium Swanson Chicken Broth
1 - 64 oz bottle of Low Sodium V8 Juice
1 - 14.5 oz can Hunt's Diced Fire Roasted tomatoes or any canned tomatoes
2 - 15 oz cans Hunt's Tomato Sauce
2 - 10 oz cans Ro-Tel Diced Tomatoes and Green Chilies
1 - 12 oz can Hunt's Tomato Paste
2 - 16 oz bags frozen Bird's Eye Cut Green Beans or any good, frozen green beans
2 - 16 oz bags frozen Bird's Eye Sweet Kernel Corn or any good, frozen sweet corn
1 - 32 oz bag frozen Veg-All or any good frozen vegetable mix
2 - 15.5 oz cans Goya Black Beans or any other beans that you like or have on hand
3 - large sweet onions, finely chopped
7 lbs boneless chuck roast, cut into small pieces. I bought two 3.5 lb roasts.
All purpose seasoning and kosher salt
Get cooking...
Set your burner to medium heat. In a 20 quart pot, combine the chicken broth and V8 juice. Stir in the canned tomatoes then the tomato paste. Stir well and continue stirring so the tomato paste doesn't stick to the bottom. You want to get it incorporated into the liquid. Add the veggies. Keep stirring. Remove the labels from the cans and put the cans in the dishwasher so they'll be nice and clean for a Pinterest upcycling project in your near future...or don't. In either case, take some time to clear the clutter. Now is when I chop up my onions. If I don't feel like doing a fine chop, I sometimes just cut the onions in half and then slice it up finely. We like onions, so we often cook our onions this way. If you have picky eaters, finely chopped onion is easily lost in the soup. Next, with a sharp knife, cut the meat into small, bite size pieces. A sharp knife is the key. It also makes it easy to trim away any fat. As you get a nice little pile of meat, add it to the soup. Stir. Add seasoning and salt by sprinkling generously. Stir.
Now that all of your ingredients are in the pot, add enough water to bring the level to within an inch of the rim of the pot. Turn the heat up to medium high. Stir. You want to bring it to a slow rolling boil. I usually keep it at a gentle boil for at least two hours, stirring every so often, then turn the heat down a bit and cook another hour or so. This ensures that the meat is tender and the flavors are well combined. The liquid will reduce to about three inches below the rim, concentrating the flavors even more.
For cornbread, we prefer the Jiffy Corn Muffin mix. It's a sweeter cornbread that complements the savory soup. I mix two boxes and bake in an oblong dish. When it's done, I remove it from the oven and cut it immediately then cover it with butter or margarine so that it drips into the crevices.
I usually start my soup early on a Saturday or Sunday morning so that it can cook while I'm working around the house. By late afternoon the house smells wonderful. We enjoy an early meal, then I ration it out into Glad Freezerware 8 cup containers. By bedtime, they have cooled enough to put them into the freezer. DO NOT put hot soup in your refrigerator or freezer. You run the risk of it spoiling as well as heating up the environment and spoiling everything around it.
And that's it. Easy peasy. Delicious and nutritious.
Enjoy!